Perform Common Management Tasks
Introduction
During this lab, you will learn how to perform some common management tasks and items.
Objectives
At the end of this lab, you will be able to:
- Suspend and Resume synchronization
- Add/Remove a database and replica
- Manually failover an Availability Group
Estimated Time
45 minutes
Logon Information
Before Login make sure windows has Applied Computer Setting to all nodes.
Use the following credentials to login into virtual environment
Connect to AlwaysOnClient as Corpnet\Cluadmin using Pa$$w0rd as the password.
Click the Type Text icon to enter the associated text into the virtual machine.
Connect to AlwaysOnN1 as CORPNET\Administrator using Pa$$w0rd as the password.
Click the Type Text icon to enter the associated text into the virtual machine.
Connect to AlwaysOnN2 as CORPNET\Administrator using Pa$$w0rd as the password.
Click the Type Text icon to enter the associated text into the virtual machine.
Connect to AlwaysOnN3 as CORPNET\Administrator using Pa$$w0rd as the password.
Click the Type Text icon to enter the associated text into the virtual machine.
Connect to AlwaysOnDC as Administrator using Pa$$w0rd as the password.
Click the Type Text icon to enter the associated text into the virtual machine.
Change the screen resolution if required.
You may want to adjust the screen resolution to your own preference. Do this by right-clicking on the desktop and choosing Screen resolution and clicking OK when finished.
Exercise 1: Suspend and resume data movement then change synchronization
This exercise shows how to suspend and resume the data movement on a per database level and how to change the synchronization type for a replica.
Tasks
Login to the AlwaysOnClient virtual machine as Corpnet\CluAdmin using Pa$$w0rd as the password.
Click the Type Text icon to enter the associated text into the virtual machine.
Open SQL Server Management Studio (SSMS)
Open SSMS by left clicking the icon on the taskbar.

Connect to the listener
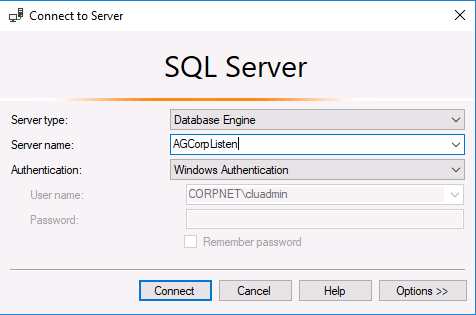
In the Connect to Server dialog box, type in AGCorpListen and then click Connect.
Suspend data movement of the AdventureWorks database
Expand the AlwaysOn High Availability Folder in SSMS
Expand the Availability Groups Folder
Expand the AGCorp availability group
Expand the Availability Databases folder
Right-Click on the AdventureWorks database and choose Suspend Data Movement
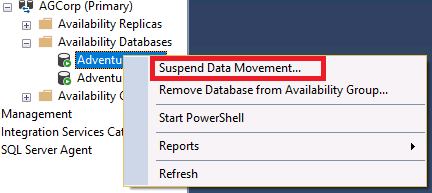
This will bring up a Suspend Data Movement dialog box, press OK
Do you notice any changes in the icon for the database?
View the status of synchronization for the AdventureWorks database
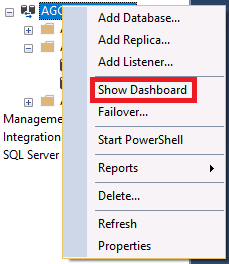
Right-Click on the AGCorp availability group in SSMS and choose Show Dashboard
What does the dashboard show? How could we use this to diagnose an issue?
Open the 08_Synchronization_Status script from the AlwaysOnClient computer in folder c:\scripts and execute it. What DMVs are being used? Is there a reason why synchronization has stopped?
Resume data movement
Open a new query window while connected to AGCorpListen
Make sure the database context is set to master and type in:
TSQLALTER DATABASE AdventureWorks SET HADR RESUMEExecute the T-SQL statement
Right-Click the AGCorp availability group and choose Refresh
Expand the Availability Databases Folder under the AGCorp availability group
What does the icon look like now?
Go to the AlwaysOn dashboard that was opened in step 4. Press F5 to manually refresh the dashboard. What does the dashboard show, now?
Run the 08_Synchronization_Status script again, what do the results say?
Why were all the replicas affected when we suspended data movement?
Change the synchronization of the replica
Right-click on the AGCorp availability group and choose Properties to bring up the Availability Group Properties dialog box.
In the bottom pane under Availability Replicas, choose a secondary replica and click on the dropdown under Availability Mode, change it to asynchronous commit.
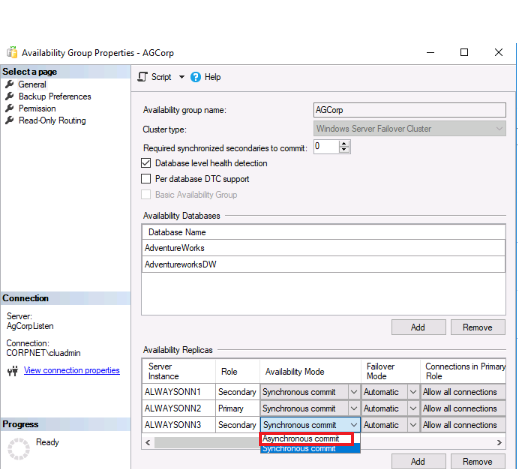
Click OK on the dialog. Does an error occur? If so, why?
Click OK to close the error dialog.
Change the failover mode to Manual, click OK.
If the Availability Group Dashboard is not already open, right-click on the AGCorp availability group and open the dashboard.
Did the synchronization state change for the now asynchronous replica? Why did it change?
Congratulations!
You have successfully completed this exercise. Click Next to advance to the next exercise.
Exercise 2: Add and remove a database and replica
This exercise shows how to add and remove a database from an availability group.
Task 1: Remove the AdventureWorks database from the availability group from the primary node
Login to the AlwaysOnClient virtual machine as Corpnet\CluAdmin using Pa$$w0rd as the password.
Click the Type Text icon to enter the associated text into the virtual machine.
Open SQL Server Management Studio (SSMS)
Open SSMS by left clicking the icon on the taskbar.

Connect to the listener
In the Connect to Server dialog box, type in AGCorpListen and then click Connect.

Expand the AlwaysOn High Availability folder in SSMS
Expand the Availability Groups folder
Expand the AGCorp availability group
Expand the databases folder
Right-click on the AdventureWorks database and choose Remove Database from Availability Group…
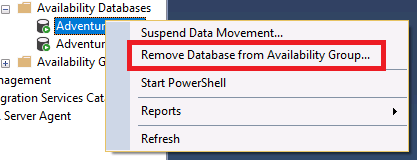
The Remove Database from Availability Group dialog is now shown, press OK.
Right-Click on the AGCorp availability group and choose show dashboard if it isn't already showing.
Does the AdventureWorks database exist on any other replicas?
Connect directly to a secondary replica using object explorer by clicking Connect in object explorer and choosing Database Engine…
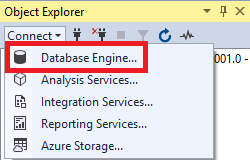
Type in a secondary replica name and choose to connect.
Expand the databases folder in SSMS. Does the AdventureWorks database exist on the secondary replica? If so, what state is it in?
Task 2: Add the AdventureWorks database into the availability group
Connect to the listener, if not already connected.
In object explorer expand AGCorpListen, then AlwaysOn High Availability folder down until you’ve expanded the Availability Databases folders if not already done.
Right-click on the Availability Databases folder for the AGCorp availability group and choose Add Database…
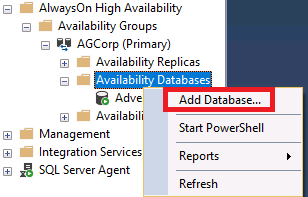
This will bring up the Add Database to Availability Group wizard
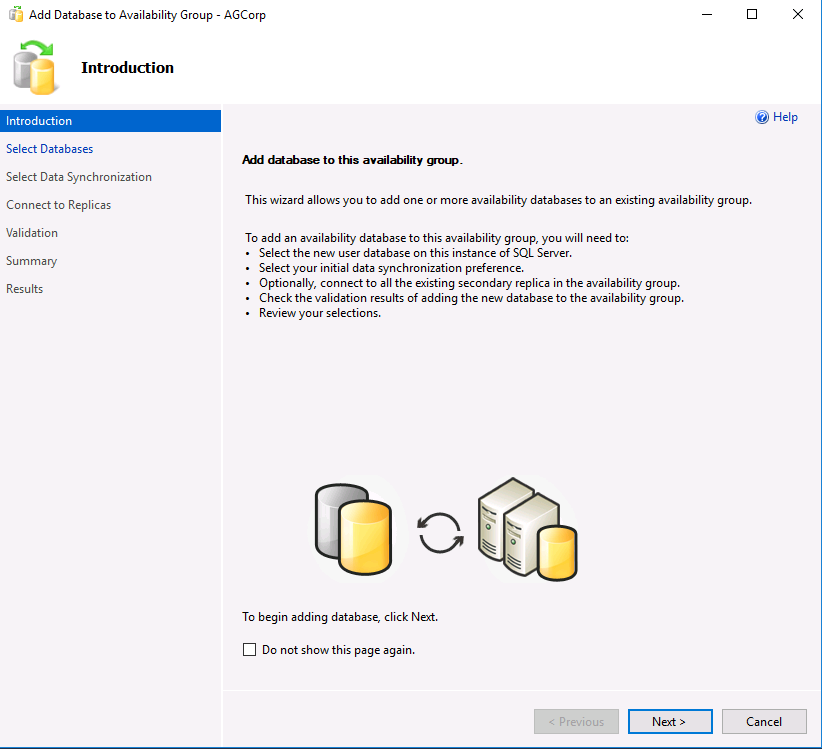
If you start at the introductory page, click next.
In the "Select Databases" page, you'll notice the AdventureWorks database already meets the prerequisites. Check the box next to the name and click next.
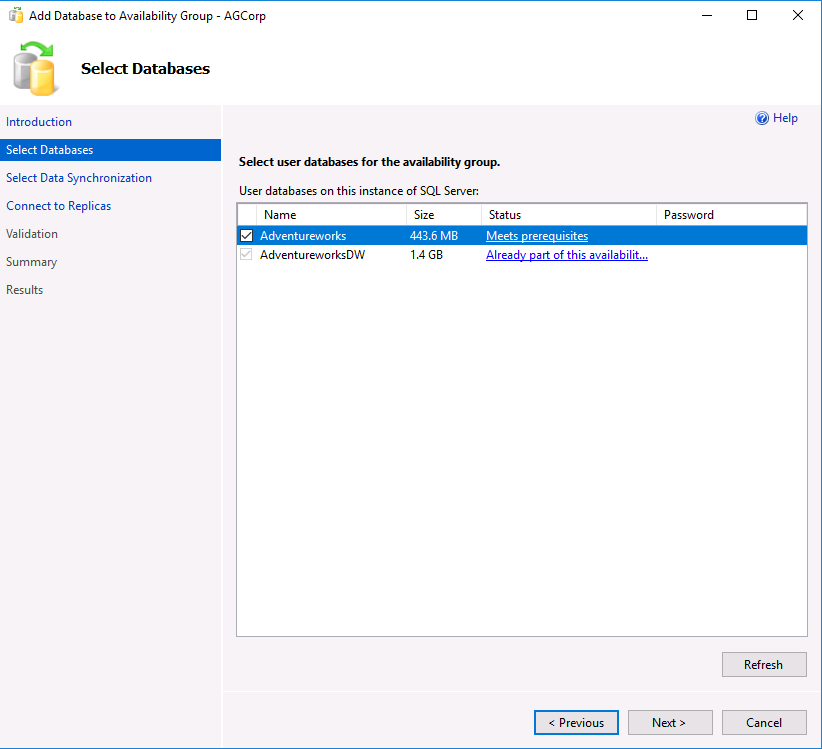
In the Connect o Replicas page, in the lower right-hand corner, click Connect All…, then click Connect on the connection dialog. Click Next.
In the Select Data Synchronization page, choose the Join Only option and click Next
You'll be presented with the validation page with all of the validation results as skipped. Click Next.
Finally, you'll arrive at the summary page. Click Finish.
When the wizard finishes, click Close.
Is the AdventureWorks database back in the availability group? What are some ways we can tell?
Taks 3: Remove a replica from an availability group
If not already expanded, expand the Availability Replicas folder under the AGCorp availability group.
Right-click on a secondary replica and choose Remove from Availability Group. This will bring up the Remove Secondary Replica from Availability Group dialog.
Click OK.
Connect directly to the SQL instance of the recently removed replica.
Expand the Databases folder in SSMS for that replica. What state are the databases in?
Task 4: Add a replica into the availability group
If not connected, connect to the primary replica by using the listener name in SSMS.
Expand the folder under AlwaysOn High Availability down to the Availability Replicas for the AGCorp availability group.
Right-click on the Availability Replicas folder and choose Add Replica… This will bring up the Add Replica wizard.
Click Next.
In the lower right-hand corner, click Connect All… and then connect with the default credentials. Click Next.
Specify the replica previously removed by clicking Add Replica…
Enter the name of the SQL instance from which you previously removed the replica, and click Connect.
The replica should now show in the Replicas list. Do NOT check the Automatic Failover checkbox and change Readable Secondary to YES. Click Next.
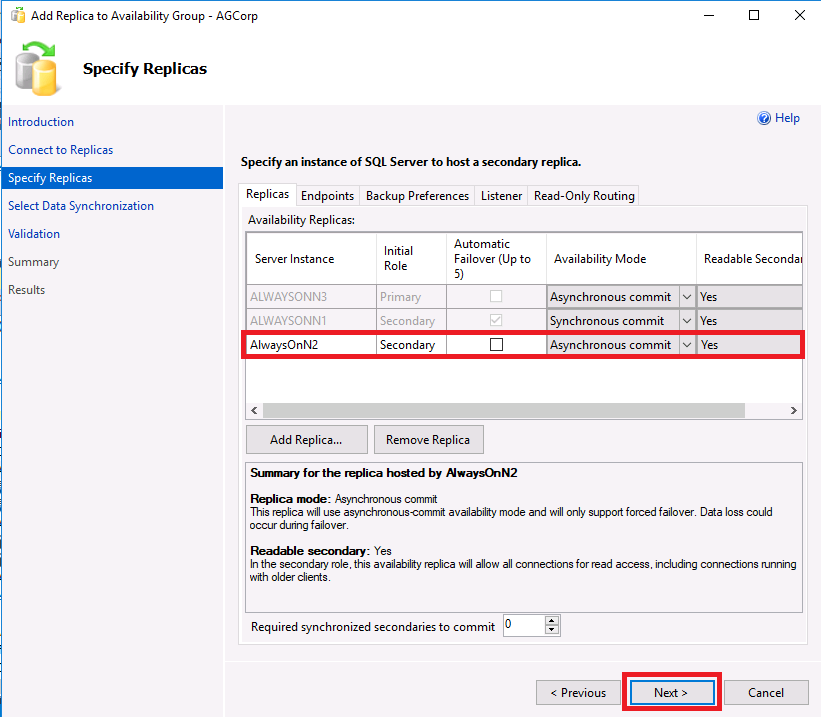
Choose the Join Only option and click Next.
On the validation page, click Next.
On the Summary page, click Finish.
Why could we add the replica back in using Join Only?
Congratulations!
You have successfully completed this exercise. Click Next to advance to the next exercise.
Exercise 3: Manually fail over an availability group
This exercise shows how to manually fail over an availability group using the wizard and T-SQL.
Task 1: Manually failover the AGCorp availability group using the wizard
In object explorer, choose Connect then Database Engine…
Supply the listener name, if not already connected. This will connect us to the primary instance of the availability group.
Expand the folder under AlwaysOn High Availability until you reach the AGCorp availability group.
Right-Click on the AGCorp availability group and choose Failover… This will bring up the Fail Over Availability Group wizard.
Click Next on the introductory page.
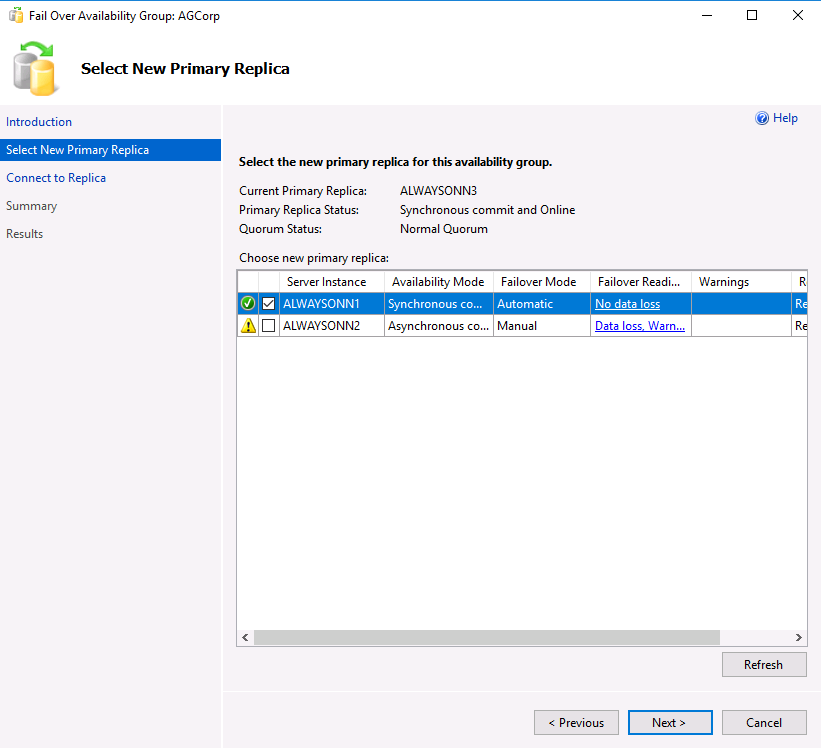
When presented with the options of which replicas we'd like to become the primary, do you notice any differences between the two possible choices?
Which one would be the optimal choice?
Click on the Synchronous Commit replica, the one with the green checkbox next to it and press Next.
We need to connect to the replica that will become the primary instance. Click the Connect… button and use the defaulted credentials. Click Connect. Click Next on the wizard.
The summary page now shows us the action we are going to take, failing over from one replica to another. Click Finish.
Open a new query window, connecting to the listener AGCorpListen. Run the following T-SQL Query:
TSQLSELECT @@ServerNameWhat replica name comes back? Was this expected?
Congratulations!
You have successfully completed this exercise. You can move to the next lab.